Import Manager | Dependency Governance Documentation
Import Manager documentation.
The Import Manager loads Dependency Governance configuration from an exported JSON file.
Accepted files are generated by the Export Manager.
Purpose
Import Manager is designed to:
- Restore configuration from a backup
- Copy configuration between Jira Cloud sites
Where It Is Available
- Export & Import → Import Manager
Before You Import
⚠️ Importing overwrites the current configuration of the selected sections.
Export your current configuration with the Export Manager first, so you can restore it if needed.
💡 If the file comes from another Jira site, link type IDs may differ. Use the Import Helper first to update them.
Import Steps
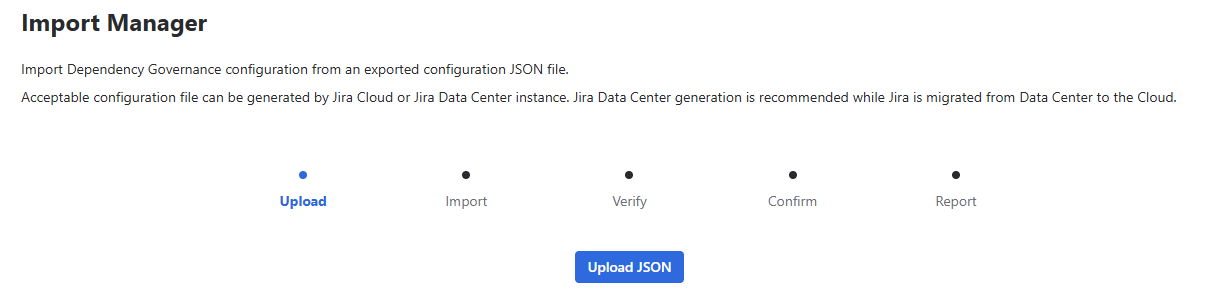
The import runs in five steps: Upload → Import → Verify → Confirm → Report.
Step 1: Upload
- Click Upload JSON
- Select the configuration file (the file picker depends on your operating system)
Step 2: Import
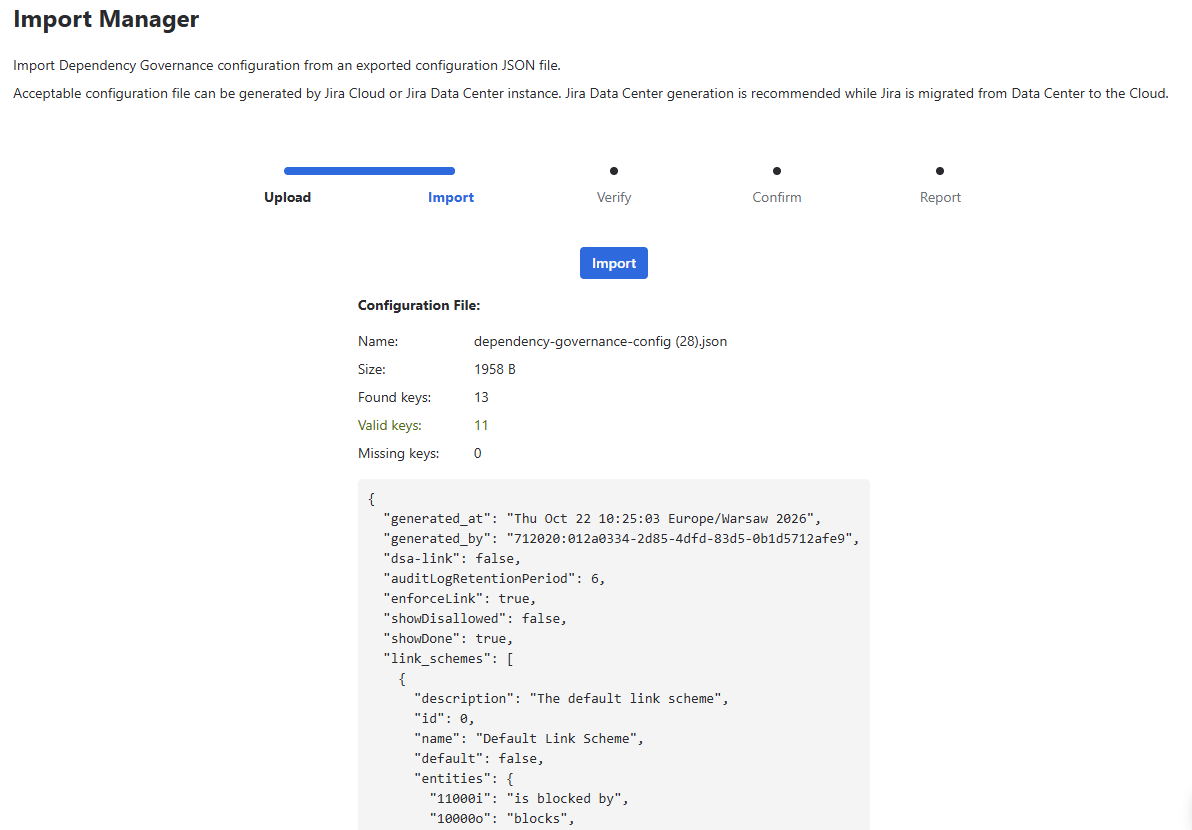
The file details are displayed:
- Name – file name
- Size – file size
- Found keys – all keys found in the file
- Valid keys – keys that can be imported
- Missing keys – required keys not found in the file
Below, the file content is shown for review.
ℹ️ Found keys include file metadata (export date and author), which are not imported – this is why Valid keys can be lower than Found keys.
You can continue even if some keys are missing – only valid elements are imported.
Click Import.
Step 3: Verify
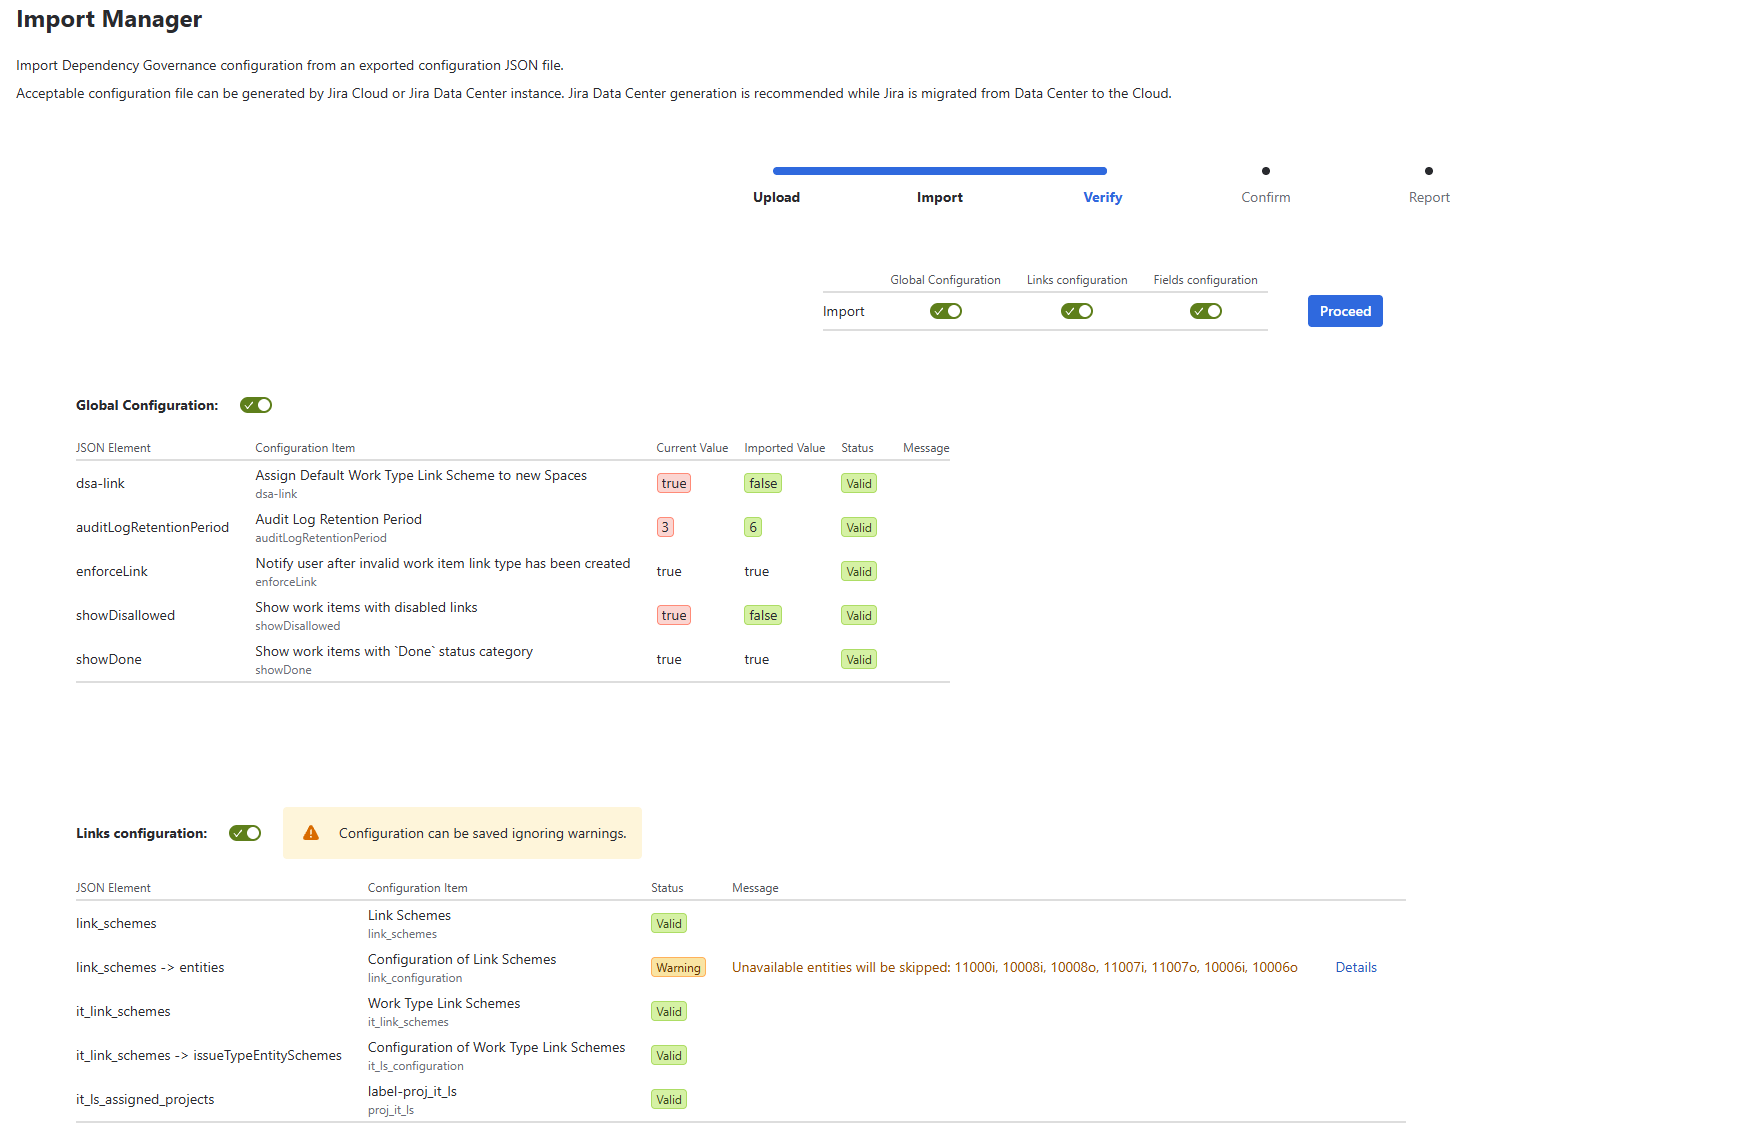
The configuration is split into three sections:
| Section | Contains |
|---|---|
| Global Configuration | App settings: default Work Type Link Scheme for new spaces, Audit Log retention, Links Enforcer, Dependencies Panel searcher settings |
| Links configuration | Link Schemes, Work Type Link Schemes and their assignment to spaces |
| Fields configuration | Field Schemes, Work Type Field Schemes and their assignment to spaces |
Each section lists its items with:
- JSON Element – key in the file
- Configuration Item – the setting it represents
- Current Value / Imported Value – shown for Global Configuration
- Status – result of validation
- Message – details of a warning or error
⚠️ Items with an error status cannot be imported.
To continue:
- Use the toggles to select which sections to import
- Click Proceed
Step 4: Confirm
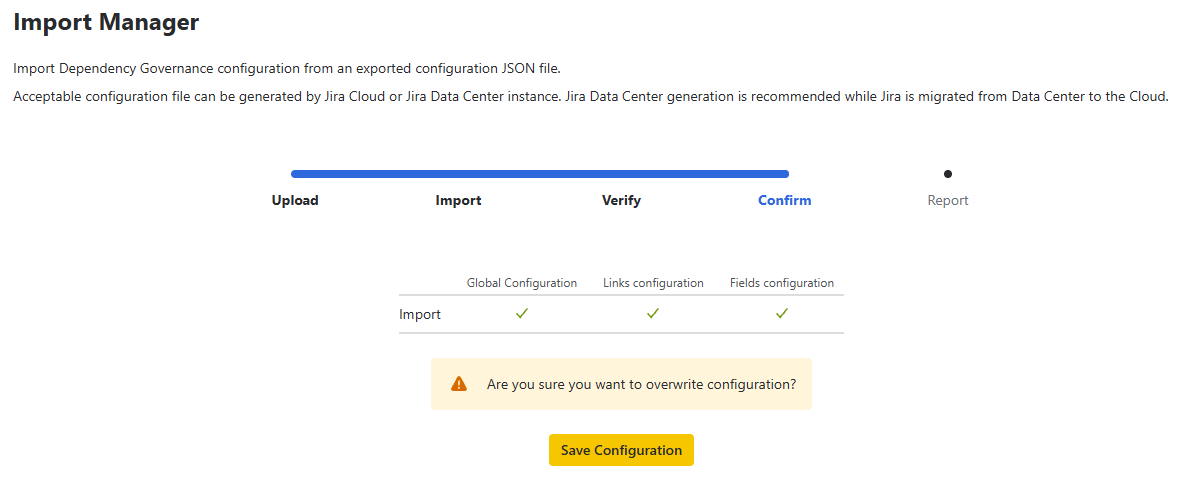
- Review the selected sections
- Click Save Configuration to overwrite the current configuration
Step 5: Report
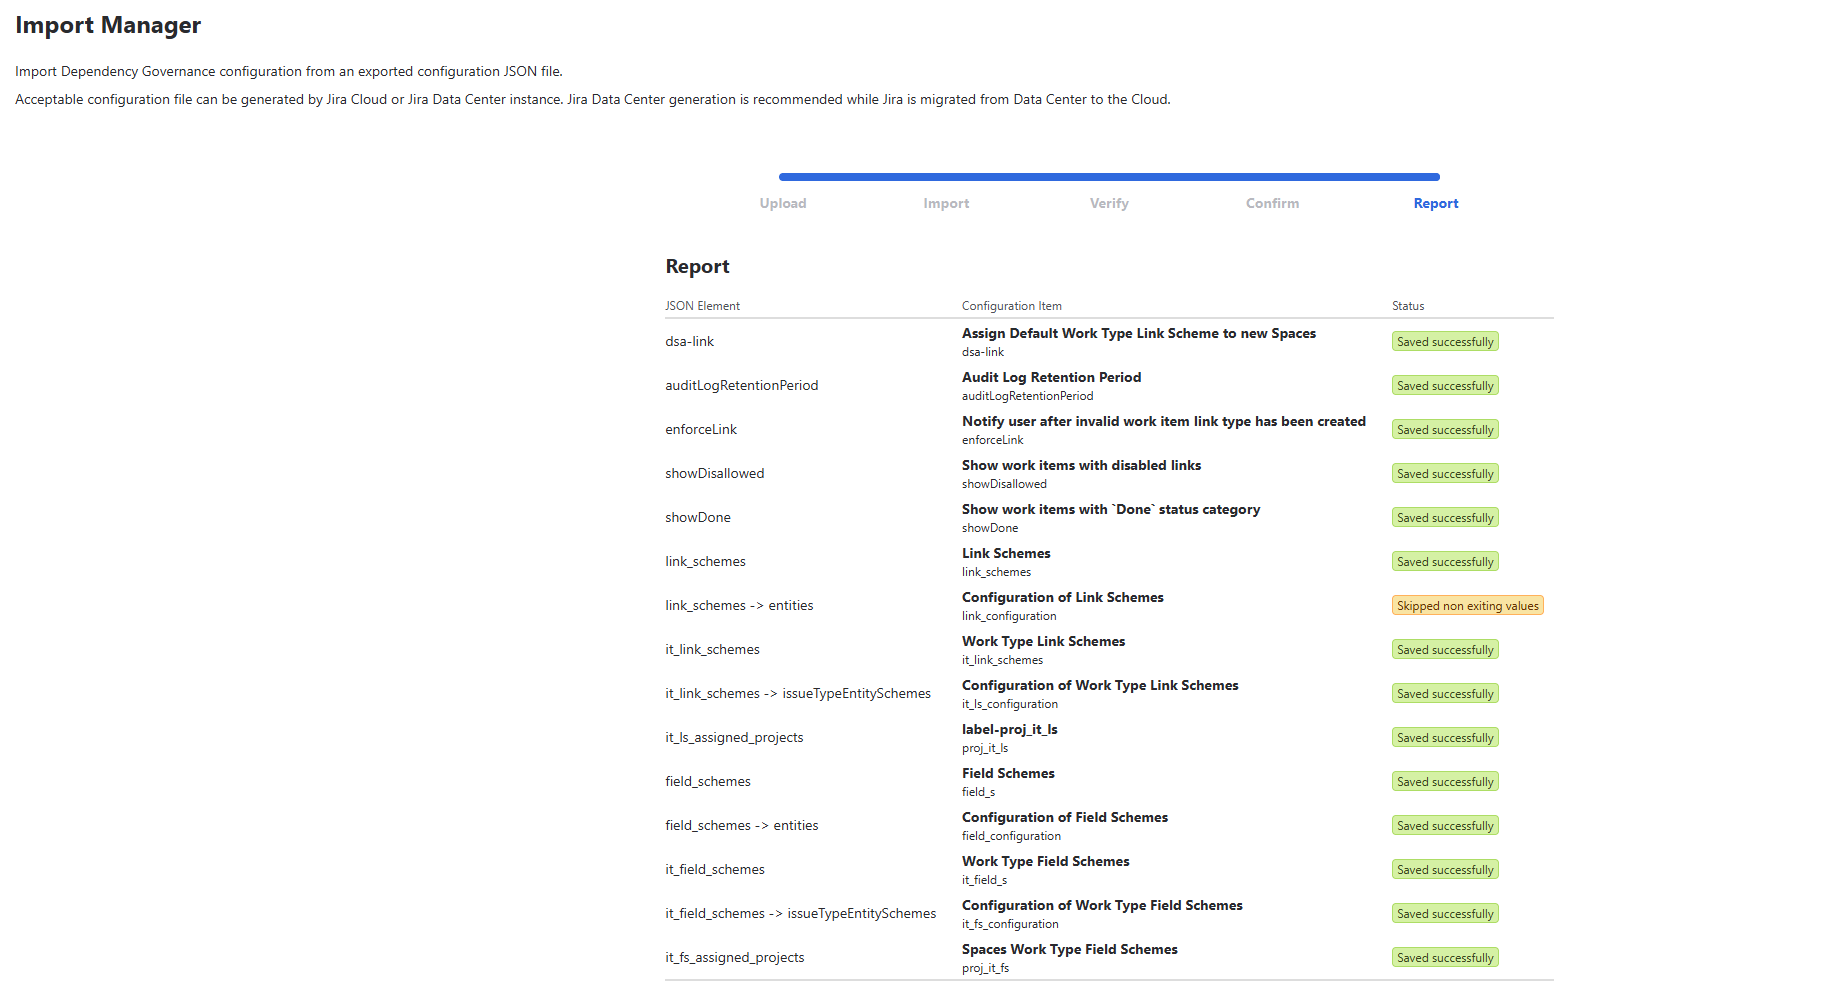
The report lists each imported item with its status (e.g. Saved successfully).
Notes
- Only the sections selected in the Verify step are changed
- Configuration is applied immediately after saving
- Existing work item links are not modified
- Each import is recorded in the Audit Log
- Space assignments for spaces that do not exist on the target site are ignored
Permissions
- Jira administrator permissions